www.fitnessapplication.co.uk- a fitness website that i created
www.charlotte-slack.co.uk my personal website with work ive created on it
Thursday, 10 March 2011

Wednesday, 7 April 2010
Camera animation fly arounds
Well since I have completed all of the animations for my scene, it is now time to start doing the camera animation, I have been putting this off quite a bit as I know its going to be very time consuming with render times etc, but atleast it gets me on track to be able to edit and put together my scene. I have had another go at the path animation tutorial: http://www.screencast.com/users/Neal/folders/Flash/media/d8bfa37a-8c1d-41c7-a95d-fcd00d594273 that I failed so miserabley at previously and it seems to have gotten a bit better, I think I'm getting the hang of it, hopefully I will become more confident with it with time as I am going to have to do around 8 or more of them I think to show off everything in my scene. I have a few blender files with various aspects of my scene. I am going to do a path animation for each one, along with a straight on animated render, I will then not necessarily use all of this in my final 30 second animation, but will show them on my blog so that you can see what I have done, whilst it is being done. Some of the animated files will also need to be edited when put into premier so keep that in mind, if there are parts that dont look right.
This is a camera fly of the pond.
This is a full top view of the pond, I really like how you get the reflection of lampost in the water.
This is a camera fly of the pond.
This is a full top view of the pond, I really like how you get the reflection of lampost in the water.
This is a full shot of the grass.
This is a camera fly of the grass.
This is the front shot of the bin/rubbish.
This is the camera fly of the bin/rubbish.
This is the front shot of the moving lampposts.
This is the camera path fly around of the lampposts.
This is the front view of the moving sign.
This is the camera fly of the moving sign.
This is the front view of the rain.
I have not done a camera fly of the rain as you can see it overall in the front view, and a camera fly would not give a different effect.
This is the camera fly of the ball seats.
This is the front view of the ball seats.
This is the full animation of the ball seats/sign/lampposts, as they were all done within the same file, whereas everything else was done in its own file, so I thought it might be nice to render it out as a whole, as it would be viewed within the file.
The next stage is to put all of these files into 'Adobe premier pro' so that I can edit them together to make a final animation. I have decided to put 'Jump in the pool' by 'Friendly Fires' as the background music to the animation, as I wanted a song that was easy to listen to so that anyone would enjoy viewing the animation. I also thought that I could edit the pond animations to fit in perfectly with the line 'jump in the pool', it seems like the perfect choice.
Wednesday, 24 March 2010
Animation Project Sketches
When designing and thinking of new ideas I usually find it easier to draw them down so that I have some idea of what I will be creating. Below are the sketches that I drew when designing what I was going to do for my animation.

This is a rough sketch of the planet seats moving around into different positions and scales. The effect will be created using keyframe animation on movement and scale.

This is a rough sketch of the planet seats moving around into different positions and scales. The effect will be created using keyframe animation on movement and scale.

This is a rough sketch of the sign moving around as though it is on its hinges moving around in the wind. The moving sign will be created by using key frame animation.

This is a rough sketch of the rubbish blowing out of the bin in the wind, it shows the rough path the rubbish will take. The movement of the rubbishb will be done using key frame animation.

This is a rough sketch of what the pond will look like. I will be using fluids to create the moving water effect.

This is a rough sketch of the lamposts shaking in the wind, this will be done by using key frame animation.

The rain effect is the only effect that covers the entire model, I will use particles to get this effect that rain is over the model area.

I will make the grass move as though it is windy. This will be done by adding an empty and playing around with the settings.
Friday, 19 March 2010
Animation: Week 8
Well the tutorials this week were slightly different. More a modelling aspect rather than animation. I have done some weighting in Maya before so the idea is not lost to me.
The tutorials showed full characters with armatures atached as I did not have these files I decided to show the general idea with shapes, to show how it is done. Both tutorials were basicly the same thing but just showing different ways of doing it, I followed both anyway. The below screenshots were from the first tutorial, I found that I got a better response from the first one, it was more noticable than the second one, as I was able to weight the same mesh at different weights.


Rather than the second one which didnt take to it aswell, it would let me weight it but only the overall mesh. It was interesting to visit this area again, just a shame I wont need to use it for my project.

Sunday, 14 March 2010
Animation: Week7
This week we learnt about motion capture, it was really interesting to learn about as it was something that I havent done before. This weeks task was to import a BVH file into blender and see what the motion capture looks like in there. I am currently having a problem with an error coming up, but I hope this will be resolved soon.
Well after looking back at it theres still a problem, but as this isn't a skill i'm going to need for my project there isn't a worry to get it fixing, atleast I tried.
Well after looking back at it theres still a problem, but as this isn't a skill i'm going to need for my project there isn't a worry to get it fixing, atleast I tried.
Sunday, 7 March 2010
My Project
Below are my findings with tutorials that I have found useful when creating my final project. Some of which were necessary for me to learn how to do do things that I couldnt work out how to do very well on my own.
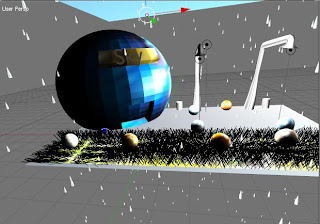 Here is a screenshot of the rain in motion, currently in the middle of a render of the rain which is taking forever. I think it has come out quite well. The overall effect I am going for is a windy one. To add to this effect I will have wind shaken lamposts, sign, grass and rubbish out of the bin. Once this has rendered I will add each one and do a render as the detail progresses. I then need to make the planet seats move around and create birds to fly in the sky, however I am currently unsure whether I will add them to the same file or create each aspect in a different one.


Below is a screenshot of the pond added to the scene, I have created it on a different file as it was too slow to try and edit and move around otherwise. You can't really see the detail on this shot as the water does move, that can only be seen in the animation, however what I can say is that the water moves naturally and I'm really happy with the result.The first of these was how to make rain, as I wanted to have rain in the background of my scene. I found http://feeblemind.tuxfamily.org/dotclear/index.php/2004/12/24/4-blender-faire-pleuvoir---making-rain very useful when trying to do this. The tutorial helped me out, but to be honest the effect is created from particles which I have already tried in a past tutorial in class. I did have to play around with the tutorial as I had a few problems getting the rain to go downwards onto my scene, as for some reason it was going up in the air, no idea why but after some rotating I manged to fix it.
 Here is a screenshot of the rain in motion, currently in the middle of a render of the rain which is taking forever. I think it has come out quite well. The overall effect I am going for is a windy one. To add to this effect I will have wind shaken lamposts, sign, grass and rubbish out of the bin. Once this has rendered I will add each one and do a render as the detail progresses. I then need to make the planet seats move around and create birds to fly in the sky, however I am currently unsure whether I will add them to the same file or create each aspect in a different one.
Right So i've just spent 2 hours waiting for the file to render and it had an error as it came towards the end so I dont think I'll be doing any animation renders for a while, I'll just document my progress with images until a later date, when hopefully the animation render will begin to work again.
Below are some images of the planet seat key frame animations:


The below screenshot shows the current stage of animation, so far the sign, lamposts and planet seats have been animated. Rain has also been animated on a different file. The sign, lamposts and planet seats were created using keyframes I found these two tutorials very useful for this: http://www.screencast.com/users/Neal/folders/Flash/media/77702fe9-8c56-41b9-817a-728ef125dbf2 and http://www.screencast.com/users/Neal/folders/Flash/media/e9ea8293-025f-4183-8df1-6185c3aa7a79

The below screenshot is the rubbish flying out of the bin and around the scene. I decided to make it a page from a newspaper and gave it a newspaper image as the texture. I think it works really well. To create rthe flying rubbish I created a series of key frames I found these tutorials really useful for that: http://www.screencast.com/users/Neal/folders/Flash/media/77702fe9-8c56-41b9-817a-728ef125dbf2 and http://www.screencast.com/users/Neal/folders/Flash/media/e9ea8293-025f-4183-8df1-6185c3aa7a79


I wanted to create realistic moving grass so that it looks as though it is swaying in the wind, I found this tutorial really helpful for this: http://www.blenderguru.com/the-secret-to-creating-realistic-grass/.
Below is my result, the screenshot doesnt really give it justice but it will be more noticeable in the end animation itself.

Friday, 5 March 2010
Animation: Week 6
This week we had a fluid task to follow. I found the task really interestng and the effect created was just beautiful. I wouldnt call it a simple skill though, takes a lot to get it looking just right. 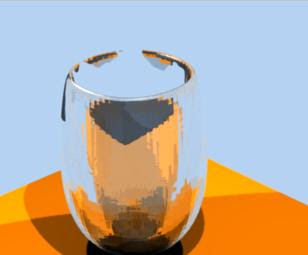 This is a screenshot of the tutorial towards the end with the round glass and water at the top, the effect cant really be shown well in a screenshot so here is a render of it as an animation as a whole. The render took around an hour and a half to render out.
 This is the glass as a square shape rather than a round shape.
 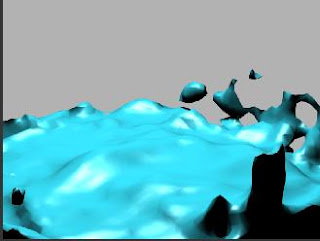 The last part of the task this week was to create something of our own. I decided to create some stairs that went into a big splash. I think the animation looks really good and effective. I think it would be a really useful technique when creating something like the ocean.
 This is a screenshot of the tutorial towards the end with the round glass and water at the top, the effect cant really be shown well in a screenshot so here is a render of it as an animation as a whole. The render took around an hour and a half to render out.
 This is the glass as a square shape rather than a round shape.
 The last part of the task this week was to create something of our own. I decided to create some stairs that went into a big splash. I think the animation looks really good and effective. I think it would be a really useful technique when creating something like the ocean.
Wednesday, 17 February 2010
Animation: Week 5
I was really intimidated by the animation we are expected to create, but once I'd read and tried out the tutorial I can see how it will all go together, actually looks quite simple to get that effect, but I will soon see when I try to make it.
Here is my render of the moving dominos following the tutorial.
Below is my attempt at making a more indept game engine machine, however it does not work how it is supost to. I spent ages applying the correct technique as used in the above one but no luck, i even looked at more tutorials hoping to get it working still no luck. It's stange as it doesn't even work at the start with the dominoes they just fly in the air, I even tried making them again to check I got it correct on a different file and it was fine so I have no idea why. My only thought is that I need to be doing something different when it get's to the ball, but if so that wasnt very clearly listed on the tutorial I worked from, 'Blender' also didn't seem to like it when I got into a lot of detail the page kept flashing different colours which was pretty anoying. Luckily I wont need this for my coursework but all the same it was a pretty frustrating process.
Here is my render of the moving dominos following the tutorial.
Below is my attempt at making a more indept game engine machine, however it does not work how it is supost to. I spent ages applying the correct technique as used in the above one but no luck, i even looked at more tutorials hoping to get it working still no luck. It's stange as it doesn't even work at the start with the dominoes they just fly in the air, I even tried making them again to check I got it correct on a different file and it was fine so I have no idea why. My only thought is that I need to be doing something different when it get's to the ball, but if so that wasnt very clearly listed on the tutorial I worked from, 'Blender' also didn't seem to like it when I got into a lot of detail the page kept flashing different colours which was pretty anoying. Luckily I wont need this for my coursework but all the same it was a pretty frustrating process.
Monday, 15 February 2010
Animation: Week4
I usually take a day and work through all the work but this week I've been hit with a fluey bug so I shall be doing a bit at a time for as long as I'm able to work, pretty anoying as there are a lot of tutorials to do and this is only one of my four modules but cant do anything about it.
Right the first tutorial 'Basic Blender Particles' I was first very intimedated by the length of it but once I'd done i felt like there was a lot of repetition but that wasn't necessarily a bad thing as I feel very confident in what I've just learnt. I end of the tutorial saw us playing around with some different effects on the particles, I did a few renders of some of the nicer effects available. I found it very interesting how you can create something so different from the same thing, I look forward to using particles again.
 This is the rings effect, It is by far my favourite it just looks beautiful. The effect reminds me of that pattern popular in the 60's? maybe i've got the decade wrong but I think you know what I mean.
 This is using the flare effect, it reminds me of fireflies, I can see how this one would work nicely in the task for this week.
 This is using the lines effect it looks like sparkly stars its really quite pretty. I can image how this effect would be useful for creating shooting stars, or even disco lights.
 This is using the star effect, this is very similar to the flare effect but a bit more definied, but the name I imagine that it is used for simple star effects.
The next tutorial I tried wasn't as sucessful I followed the instructions as best as I could considering most of the buttons were in a different order but even parented the particles were just ordinary like the ones from the first tutorial they wern't the boxes, I got really stumped as I spent well over an hour trying different combinations I just dont understand why it wont work, I rendered my end result which isn't like theres but it shows some animation. It's really anoying as I think this would be a really useful technique.
Right the first tutorial 'Basic Blender Particles' I was first very intimedated by the length of it but once I'd done i felt like there was a lot of repetition but that wasn't necessarily a bad thing as I feel very confident in what I've just learnt. I end of the tutorial saw us playing around with some different effects on the particles, I did a few renders of some of the nicer effects available. I found it very interesting how you can create something so different from the same thing, I look forward to using particles again.
 This is the rings effect, It is by far my favourite it just looks beautiful. The effect reminds me of that pattern popular in the 60's? maybe i've got the decade wrong but I think you know what I mean.
 This is using the flare effect, it reminds me of fireflies, I can see how this one would work nicely in the task for this week.
 This is using the lines effect it looks like sparkly stars its really quite pretty. I can image how this effect would be useful for creating shooting stars, or even disco lights.
 This is using the star effect, this is very similar to the flare effect but a bit more definied, but the name I imagine that it is used for simple star effects.
The next tutorial I tried wasn't as sucessful I followed the instructions as best as I could considering most of the buttons were in a different order but even parented the particles were just ordinary like the ones from the first tutorial they wern't the boxes, I got really stumped as I spent well over an hour trying different combinations I just dont understand why it wont work, I rendered my end result which isn't like theres but it shows some animation. It's really anoying as I think this would be a really useful technique.
The next two tutorials were fire related, the first one creating the fire, and the second one adding a lattice too it, I found that the second video with the latice didnt add that much difference but it's good to know you can add lattices to particles.
This is my fire from the first tutorial.
This is the fire from the second tutorial with the lattice on the particle.
I found creating the fire effect quite straight forward after I'd done it, however throughout making it I had a few problems trying to get it to look like I wanted to, infact I had to change quite a few of the settings, mainly making them higher. This was due to the fact that for some reason mine didn't rise as high as the one on the tutorial, but in end I think I did a good job on the technique, its pretty effective and I can see how it could be used for things such as rain and snow, just using it in the oposite direction, or even as fireworks if the lattice was made gigantic at the top.
The static particles fur was really awkward to do as so many of the buttons were non-existance due to the different version, I had to make quite a few guesses some of which may be really wrong but the end result isnt too bad, bit thicker than I would have liked bu oh well.

Sunday, 7 February 2010
Week 3: Animation
First tutorial pretty simple and effective however I did mess up half way through and wonder why it wasnt working and starting it over again realised i'd named the wrong thing so the camera wouldnt rotate oh well sorted now.
However I am starting to wonder whats all the fuss about the monkey template why a monkey and not an elephant?
This is the render with the moving camera, after watching them both I prefer the standard shot you can see the process clearer, plus the quality doesn't seem as good on this one even I rendered them both on the same setting strange!
However I am starting to wonder whats all the fuss about the monkey template why a monkey and not an elephant?
The next tutorial was easy to follow, however at the end I felt mine did look like the cylinders were crushing the rectangle but it didnt look like mine were moving like his so I went back to the middle and tried it again and got the same result, I'm guessing maybe its more like an alussion. The only difference with mine is that I exstruded the cross from the cylinder and he said he made it from a box so maybe that's the problem so thats something to consider in the future.
I was really dreading this weeks tutorials because of the task i'd seen that we had to do like worrying about it all day I was at work, but now i've done it it doesnt seen so bad, I guess thats because I just learnt the skills to do it. I rendered out two versions one with a standard camera and one with the camera path fly around effect on it. When it come to the initial process using the lattice etc that was fine I had no problems what so ever it was very clear in my mind still, but when it came to rotating the cylinders I got stumbled and played around a little bit, it was then that I realised how easy it was, that was because when I was rotating it in the y and z axis it kept moving the object but on the x axis it was fine so problem solved. This had made me feel a bit more confident as after last weeks disaster I was really worried like dreading doing the tutorial section of this course, I just really hope that they continue to go aswell as today, but knowing my luck they wont.
This is the render with a normal standard camera shot.This is the render with the moving camera, after watching them both I prefer the standard shot you can see the process clearer, plus the quality doesn't seem as good on this one even I rendered them both on the same setting strange!
Monday, 1 February 2010
Animation: Week 2
The IPO curve window tutorial was yet another interesing way in which you can animate within blender, it was interesting to see the lines in which I had previously animated, it was nice to have a play around and change the directions and intesity of the previous animation, it was so intense that at one point the 'Monkey' goes off view, so it may look different than the tutorial that I actually followed, as I kind of took into my own hands. However I cant see that I'm ever going to really use it, but I may be wrong.
I was starting to think this is going too well, and ofcourse the problems start now, Benzier curves seem to have been put on this earth to kill me because they are doing the complete opposite of what i'm telling them to do. I make the plane and the ground fine, you add a Benzier curve into the mix and an hour is spent in frustration so much that you think maybe a degree is'nt for me should I quit and that is even an overstatment. I tell it to go one way and it goes the oposite way, so for my 'path' I have only gotten half way and that is due to me moving each bit manualy because when I click it goes the wrong way, So i'll try and carry on with the path half way and see if I can get more than two minutes into the eighteen minute tutorial otherwise I will be here all night.
 This is a screenshot of the plane clearly far away from the path line, still comfused as to why but hey.
So I come back to it the next day a clear mind and all that, and it kind of went a bit better well I got it to work but not correctly, but I cant see how I'm ever going to get it to work, I've spent hours trying to do it and I cant take it anymore, it's anoying because I really liked doing the keyframes and this way obviously hates me. So this is my final result It doesnt work correctly like it doesnt fly where its supost to, I'll post a screenshot of that, but atleast it's following the path which is more than I got it to do last night. Hopefully I'll have more luck doing it using key frames in a minute.
Below are two videos one being my first atempt, dont know why it kept going underneath the ground, but i think I fixed it by the second one. However the plane isnt moving very excitingly this is due to the fact that whenever I tried to rotate it blender kept flashing colours across the screen and crashing so i've done my best with what I could, I'm clearly having a very bad week in regard to this module:(
This one is the pretty shocking one.
Right I have no idea why this has come out like this it is set up nicely with the camera I have no idea why it is just staying in one area when the scene goes across the whole landscape. The animate end is in the right place, i'd have another go but I am frustrated beyong belief with this weeks tasks to give it another go until a later date arghghhhhhhh
Tuesday, 26 January 2010
Term 2: Week 1: Animation Begins
So I worked through the first two tutorials easily enough, they seemed straight forward but at the same time it seemed pretty pointless to learn two ways of doing the same thing but atleast I have that option I guess, the demonstrations also seemed to stretch on longer than was neccessary. The first thing I noticed when it came to blender was that whenever I went to animate it would crash, sometimes recovering itself before the finished result has rendered, I'm not sure if thats my computer, but I have pretty high specs so I cant see why that would be a problem, the second thing being it take a hell of a lot longer to render, so I'm going to need to keep that in mind when planning my work as I cant do a lot else while I'm waiting for it to finish.
Here are my final results from the two tutorials:
For the third task I decided to create something of my own choice, I decided to stick with having an indoor room, but instead of a mouse I decided to create a bee buzzing around, this was partly because I wanted to be able to play around with more space, as with a mouse you can only use the ground, and also because for a project I did last term I matchmoved a mouse on a piano so I'm sick of modelling one to say the least. I made the bee from a sphere exstuding the wings and head from the initial body shape, and then shaped appropriately, I then exstuded upwards then scaled inwards and then exstruded upwards slightly then scaled outwards to create the antenna on top of the head. I created the bee's stinger out of the back of the bee by exstuding and then scaling inwards to create a sharp point I smoothed and subsurfed everything on the bee. I tried to create some legs coming out from the bottom of the body but it just never looked right, they were far too blocky and large even when I subdivided loads of times. The trickiest and somewhat longest process was the texture I put a black over the whole thing, then selected individual faces for the yellow stripes and white wings, this was such a long process as I had to subdivide many times to get the faces in line for the stripes, so the faces were very small and there was a lot of them. I couldnt just select aload of faces at once as it picked up too many of the ones I didnt want. This completed the main element. I made the backing by scaling a cube upwards and deleting a few faces so the camera could see everything, put a wooden texture on the bottom and made coloured the walls pink. The animation process was really easy to pick up I didnt have any problems, I've done a fair bit of animation in 'Maya' so the process was reletively easy for me to complete. I simply just played around with where the bee was going the direction and the angle, I made a few mistakes and had a few problems deleting some keyframes but once I learnt how to do that it looked fine. I found it quite a long process, as its not just animation you need to model everything first thats the time consuming bit, but I found the animation really fun to do, much more so than modelling, I think it's because you can completely change a model as to how you decide to animate it, change the emotion, the view it is to be seen in.
Here are my final results from the two tutorials:
For the third task I decided to create something of my own choice, I decided to stick with having an indoor room, but instead of a mouse I decided to create a bee buzzing around, this was partly because I wanted to be able to play around with more space, as with a mouse you can only use the ground, and also because for a project I did last term I matchmoved a mouse on a piano so I'm sick of modelling one to say the least. I made the bee from a sphere exstuding the wings and head from the initial body shape, and then shaped appropriately, I then exstuded upwards then scaled inwards and then exstruded upwards slightly then scaled outwards to create the antenna on top of the head. I created the bee's stinger out of the back of the bee by exstuding and then scaling inwards to create a sharp point I smoothed and subsurfed everything on the bee. I tried to create some legs coming out from the bottom of the body but it just never looked right, they were far too blocky and large even when I subdivided loads of times. The trickiest and somewhat longest process was the texture I put a black over the whole thing, then selected individual faces for the yellow stripes and white wings, this was such a long process as I had to subdivide many times to get the faces in line for the stripes, so the faces were very small and there was a lot of them. I couldnt just select aload of faces at once as it picked up too many of the ones I didnt want. This completed the main element. I made the backing by scaling a cube upwards and deleting a few faces so the camera could see everything, put a wooden texture on the bottom and made coloured the walls pink. The animation process was really easy to pick up I didnt have any problems, I've done a fair bit of animation in 'Maya' so the process was reletively easy for me to complete. I simply just played around with where the bee was going the direction and the angle, I made a few mistakes and had a few problems deleting some keyframes but once I learnt how to do that it looked fine. I found it quite a long process, as its not just animation you need to model everything first thats the time consuming bit, but I found the animation really fun to do, much more so than modelling, I think it's because you can completely change a model as to how you decide to animate it, change the emotion, the view it is to be seen in.
Monday, 23 November 2009
So Maybe Theres More
Right so after some discussion in class today, I've decided that I'm going to add more to my interior view, I'm happy with my outside, however I'm going to create a bin for the outside, as I think it will add more detail. But the major works going to be completed inside.
I'm going to create some bar stalls around the bar, create something to go on the walls as they seem a bit bare, and put colour lighting over the dance floor area. I better go and get cracking.
I'm going to create some bar stalls around the bar, create something to go on the walls as they seem a bit bare, and put colour lighting over the dance floor area. I better go and get cracking.
Right I decided to create something round for the walls obviously to keep in with the space theme. I created a sphere deleted half of it's faces, so that I had half a sphere, I textured it with a blue glittery texture and positioned on the wall, I orignally decided to put 3 on each wall, but it looked too much, just in your face, so I decided to just have it on the back wall ,to make a feature of it.

I think it looks quite stylish and really compliments the other objects in the scene.
This is the seats that I completed for the bar, I created them by using a circle and exstruding upwards and scaling inwards and outwards. The main texture is metal and the seat cover is the earth texture that I used for the planet seat outside. I decided to use the earth texture for the seats because the user is sitting on earth, it may help them remember where they are in my space themed building.

This render is the finished bar with everything in position, I am very happy with it, I think it had realistic detail, and all the objects you would find in a real bar.

The last object I had to make was a bin for the external view. To do this I created a circle exstruded it upwards, then cut out the top faces so you would see inside. I then textured it with a silver glitter texture. I think it works quite well and makes it look like it was made out of concrete, even though the texture isn't that strange.

 This screenshot shows the bins within the scene.
 This is the final thing I had to do for my internal model, the dancefloor area. I created some spot lights, changed the colour, adjusted the settings available, and then just positioned them. I think they work really well and look really pretty, I'd happily dance in that area.
Friday, 20 November 2009
Week 10: Pretty Trees
I'm currently 7 minutes into the tutorial, just got to the bit where we are left to get on with making more branches ourselves, so thought I'd add a current render, incase I have problems like last week, so I've got a bit more to show for myself.


This is the tree 11 minutes in, just used the sculpt tool for the first time ever, I've never needed to use it before, so it was good to learn it now incase I ever do. To be honest I feel like the tree is at a stage where you could make all the spheres bright colours and it would look like a tree out of willie wonkers chocolate factory or something like, I've definutely got a visual in my head.
 From the last stage up until now I've had a few problems but that resulted to the fact of not knowing how to move things from one layer to the next, therfore I had to go to an earlier saved version and do a fair bit again. On my first attempt one one of my spheres went into the new shape. On the second attempt a few are missing not really sure why, but it would mean I'd have to go a lot of stages back, so I'm hoping it will look alright without it.
Just had a bit of a panic moment at around 15 minutes my branches disapeared after generating the selection. I looked at previous comments and other people had had the same problem, so I did what they said, still a problem, followed what another person said, and a problem again. It was not until I realised there was a comment in regard to this on the lecturers blog that my problem was solved, simply not pressing the 'Fill Twigs' button. It seems so silly for one little thing to make such a difference, but that what the tutorial is so far unfortunately.
Here is my most recent render after adding the 'Normal Mapped Bark Texture':

This next render is the stage after just texturing the leaves and rotating them so the top of the leaf is facing the sun, its at minute 21:
 I think its starting to look good, if only all my branches had leaves on them, but atleast I get to finish the tutorial and see an end result hopefully. And to be fair leaves on trees are uneven, so I could just say that part of the tree is dead haha.
Here is my final tree, with the red colouring as used in the 'Node Editor':
 The red/orange definutely makes the leaves appear more like autumn, which is pretty approriate for the time or year.
I also created a little scene for it some grass and a background, with the background one blender kept having to close as it was crashing I presume, just tried it without the background and the same problem, thats a shame as I thought the tree looked good in a scene, oh well more time wasted.
Overall the tutorial was pretty useful, and the effect was nice, just some things seemed more complicated than they needed to be, like for example why couldnt the bark texture just be put on as a regualar texture it didnt make any difference to me but hey, nice result in the end.
Tuesday, 17 November 2009
Sketches/ Ideas
From my research it was clear to me that I wanted a single storey building. I wanted it to be single storey as most bars/ clubs that I go to are that way, and I wanted it to be as realistic as possible. I then decided that I wanted both aspects to be seperated so that it didn't comfuse the user, therefore I have half bar and half club. The shape of my building is did change from square to sphere, this was also to do with realism, most buildings I've seen are square/ rectangled so I thought it would be best to make it look realistic. It wasn't until I'd done more research and stepped further into my theme that I decided that I coud make it a bit different, yet look realistic, I'm really happy with the end result.
When I started to make my models I found it hard to work out where I wanted what etc. So I decided to draw them to make it easier to work with and visualise.
 This was my external view, before I decided to change it.
 This is a drawing of the external view that I decided to create.
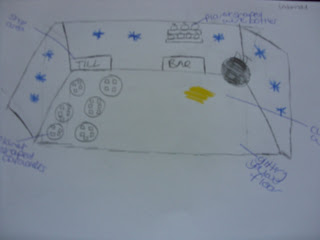 This is the internal view before I changed it. I needed to change it as the shape was square, and my new external view was a sphere.
 This is the internal view that I am currently creating, hopefully it will continue to look like this. The strong colour themes are gold, blue glass and a moon texture. I wasn't originally going to stick to a colour theme, but as I was working along I found that it looked more attractive.
When I started to make my models I found it hard to work out where I wanted what etc. So I decided to draw them to make it easier to work with and visualise.
 This was my external view, before I decided to change it.
 This is a drawing of the external view that I decided to create.
 This is the internal view before I changed it. I needed to change it as the shape was square, and my new external view was a sphere.
 This is the internal view that I am currently creating, hopefully it will continue to look like this. The strong colour themes are gold, blue glass and a moon texture. I wasn't originally going to stick to a colour theme, but as I was working along I found that it looked more attractive.
Saturday, 14 November 2009
Would You Like To Come Inside?
eeeee so I started my inside properly just now, and I'm in a good mood because I've been worried about it like I wasnt sure how things were going to go together, like for example I wanted to make a DJ stand but I wasn't sure what to put on it. I made it in a different file so that I have more room, I'll merge it later. The thing is once I started I couldn't seem to stop the ideas just kept merging, I just hope that the rest of the internal view goes like this. All I know is that it's going to be really interesting putting it all together as the shape is now a bit awkward but we will see.
This is the till that I modelled for the internal view, it will go in the 'shop' area of the building. I creeated it using a plane with various exstruding and deleting of faced. I used a gold glitter texture for the overal object, with plain black keys. The screen is a seperate plain, that I textured white.


Heres the DJ deck bit, I'm pretty happy with it, had a few decisions to make in regard to the deck slider/ button thing, but thats explained in my report. I'm in a good mood, feeling much better more productive after tomorrow. I'm spending way to much of my time on the module, better get on and do some of another one soon.

Haha well I've just started my internal view again, 3rd time lucky aye? Because it was so awkward in shape I was unable to actually put anything in it, as the back wasn't further enough, I initially exstuded the back further back and exstruded the front line forward so it looked even on the sides, but it just ended up looking messy and horrible, and still didn't really work. Also the floor was uneven at the bottom so not really realistic anyway. I probily could have completed the project with it, but it just didnt look good enough, and would have made it much harder to complete. So I was thinking of an easier way, hmmm if only I could use a cube, its so flat I thought to myself. Thats when It hit me, what if I could use a cube but round the walls so that it gave the effect that it was the inside of the Sphere used for the outside. I looked online for tips, and it was so straight forward that I dont know why I didnt think of it before, simply put a subsurf on it. So now I have a cube with rounded edges, which gives the effect that its the inside of the sphere AND has a straight floor and depth, so much better. Although to be honest I could have used a cube shape and just said that the inside had the walls bored up or something, but atleast this way it fits the part.
 You could say that it looks just like my previous one, but trust me it's so much easier to work with, you just cant really see the depth until theres objects in it.
Well as I was working out what I've still got to do today and realised there wasn't a lot of this model left to complete, so thought i'd better post some recent renders, so you can see my train of thought.


Here are two views across the inside of the building. All I've got left to do is create and add some bottles to go on the shelves then sort out some suitable lighting, not really sure what I'm going to do for it yet hmmm.
I'm much prouder of the internal view, I think it may well have taken me less time, but thats because I've become more confident with 'Blender' as a software as the shapes I've created in here are much more complex than those of the external view. Then again it could all faze down to the gold colouring it is rather attractive.
 I thought I'd add a render of the beer pumps also as there is a fair but of detail on them, including the difference of logo at the top that you can't really see far away. I created them from a space and exstruding, followed by the use of a lattice to get some more shape into them.
Well I've just created the bottles, textured them and positioned them in place. I used the same blue glass texture as I used for the outside building, and a cork texture for the top of the bottle. I created sphere bottles to continue with the space theme. Here they are in position, I think the contrast of the blue against the gold and moon texture looks beautiful. I'm really happy with it, all thats left to do now is sort out the lighting, I think I might see what the bottles would look light lit up, like that tutorial I tried last week, have to have a good think.

Now I have finally finished the internal view I thought that I would post a few renders of the finished results.


Subscribe to:
Posts (Atom)

